MENU

Learn How to Draw

Drawing Tutorials
Instruction for Charcoal & Graphite Pencil Artists
NEW: Video Drawing
Tutorials are now available
that will help you turn your pencil sketches into Realistic Drawings.
Now you can learn my pencil drawing techniques even if you can't attend one of my live Drawing Workshops. Click the button below to learn more about my

Make sure you join me on Facebook and subscribe to my YouTube channel
Join me on  and Watch me
on
and Watch me
on ![]()
To see
samples of my drawings so you know what these techniques can do,
click
Pencil Drawing
Galleries
Learn How to Draw - Graphite Pencil and Charcoal Tutorial
The drawing tutorial below contains techniques to create realistic looking artwork to provide fellow charcoal and graphite pencil artists insight into my methods. The first part will explain the pencils and blending tools I use to render both rough and smooth textures. Once you know how to create realistic looking textures, you're on you way to creating much more realistic looking artwork. The second half of the page shows a step by step tutorial of one of my latest drawings so scroll down to see images of the tutorial. For more instruction, I also offer links on this page for my drawing technique book, pencil drawing supplies and drawing workshops,
If you feel you learn better by watching videos rather than following step-by-step pictures, please click for my Video Drawing Tutorials.
#1 Getting Started
Once you have decided on your subject, you need to decide on the best techniques and materials to use. There are so many things to consider. Should the background stay white? Should you use a smooth paper or rough? Should you use graphite, charcoal, or a maybe a combination of both. It's enough to make you take up sculpting! Don't get discouraged. This tutorial will answer these questions and more.
The first thing you need to do is analyze the textures in all the areas of your subject. Decide which areas would be considered rough and which are smooth. Notice where contrasting textures and values are adjacent to each other.
Once you have identified the basic textures and values of your subject, you need to decide on the appropriate techniques to use in each area.
#2 Using Charcoal and Graphite Pencil (why I use both in each drawing)
The individual granules of charcoal have an irregular shape. When light strikes a drawing containing these particles, it bounces back in many different directions. That means when it is pushed to its darkest value, charcoal doesn't have the reflective glare that is common with graphite. Usually the darkest values in a drawing are shadows, and, if you are trying to render a subject as realistically as possible, the last thing you want is a shadow that reflects more light than the subject. I use both charcoal and graphite pencil in different areas of my drawings.
Subjects I typically render with charcoal pencils:
-
Wood, Bark, fur, hair, eyelashes, pupil of the eye, dark line between the lips, nostrils, coarse fabrics, - like denim, leather, cast shadows,
Subjects I typically render with graphite pencils:
-
Skin tones, Shading in the white of the eye, Glass, Porcelain, Light values in shiny metal, Smooth fabrics - like silk, Light shading on paper objects- like playing cards.
My favorite brands of charcoal and graphite, and carbon pencils: (links are below to order the supplies directly from my web site.)
-
Graphite:
There are many artist grade graphite pencils to choose from these days. A 2B pencil of one brand may be vastly different than the 2B of another brand. I currently use Kimberly drawing pencils which are manufactured by the General Pencil Company. These premium graphite drawing pencils are extra smooth artist quality hex shaped drawing pencils. Available in 20 degrees from 9H to 9xxB. The 9xxB is becoming one of my favorite graphite pencils. It is capable of extremely dark values with little or no graphite shine.
-
Charcoal:
Many people who are used to the feel of graphite effortlessly gliding across their paper find charcoal too abrasive. Currently I use Primo Euro Blend charcoal pencils manufactured in the USA by General Pencil Company. These are smoother than other charcoals I have tried. There are three degrees of hardness ranging from HB (hardest) to 3B (softest). Along with the General's Primos, I use their regular charcoals. The single most important pencil I use is the General's 2H Extra Hard Charcoal. This pencil is hard enough to get an needle sharp point, yet since it is charcoal, it is capable of very dark sharp lines. Obtaining clean sharp edges is very important in my work. All charcoal smears easily so if you are not familiar with this medium you may consider reading the chapter entitled Keeping Your Drawing Clean on page 18 of my technique book.
-
Carbon Pencils:
Carbon pencils can be used in place of charcoal in areas to separate the subject from the background. When carbon pencils are used in combination with charcoal and graphite, their inherent characteristics make them ideal for separating subjects containing similar values. Generally, I use charcoal for the background and carbon or graphite for the subjects. I currently use the new General's Primo Elite Grande #5000 and Generals Carbon sketch pencil for this purpose.
-
Drawing Pencil Kits
You can order what I consider to be the essential drawing supplies directly from the links below.
Drawing
Pencil Sets
J. D. Hillberry
(Click the Image below for ordering information)
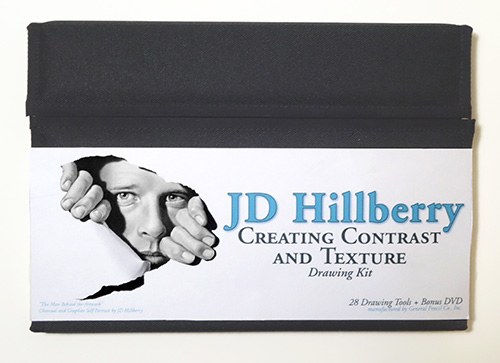
Creating
Contrast & Texture
Drawing Kit
Contains everything I use to create my
Realistic Drawings
(click on the image for more information)

Includes access to a 35 minute video with me demonstrating how I use all these drawing tools.
NOTE: This is not a physical DVD.


#3 Blending
I use various tools to blend with also. Each creates a different texture and spreads each medium differently. Using the right blending tool can mean the difference between using a few quick swipes to create the exact look you want, or, re-working an area for hours (or until you rub a hole in the paper) and giving up in frustration. These are some of my blending tools. They are all included in my Creating Contrast and Texture Drawing Kit
-
Blending Stump: These are tightly wound paper sticks with points on both ends. They are available in several diameters. Use them to blend large areas of the medium and also to apply the medium directly to the paper for softer effects.
-
Tortillon: These are generally smaller and not wrapped as tightly as blending stumps. They are not as solid as blending stomps and they create a slightly different texture.
-
Felt pad: Purchase 1' x 1' white squares at a craft store. Creates random textural effects for a variety of natural looking textures.
-
Paper Towels: Each kind of paper towel will create a different texture. Rough towel make rough textures and smooth towels create smooth textures. I usually prefer smooth paper towels for most things and switch to the felt pad if I want rougher textures. The brand I currently use is Viva. They can easily be torn into half sheets and package reads "stays strong when wet". These soft paper towels are great for smooth skin textures when the texture a chamois creates is too smooth
-
Facial Tissue: Good for blurring the edge of shadows and softening unwanted pencil strokes. Soft paper towels are better in my opinion because they don't break apart as much and leave "stuff" all over your paper. Paper towels are another choice if you don't want to lighten the area as much.
-
Paper: Blending with paper brings out the texture of the drawing paper. The paper you use to blend with makes a big difference in the texture created. Try wrapping notebook paper around you finger to start with. Good for separating two objects that have similar values by using only textures.
-
Chamois: To imitate extremely smooth textures like wrinkled paper and reflective surfaces like glass. I also use it like an eraser to lighten large masses of dark charcoal or graphite.
-
Bamboo Blending Cloth: This is a new material I've found recently that creates a rougher texture than a chamois but smoother than the felt pad. I've found it really helpful for creating realistic skin textures. It is what was used to create the skin texture for this eye:

To see a step-by-step video of me drawing this eye click
Realistic Eye Tutorial
The Bamboo Blender is also included
in my
Bonus
Pack
-
NOT FINGERS: I know some people don't have a problem with it but it can be a nightmare. I suggest you even be careful touching important areas of the paper with your bare hands. Your fingertips can transfer oil to the paper. This oil becomes apparent if it is in light areas of blended charcoal or graphite. Graphite and charcoal work exactly like finger print dusting powder, leaving the incriminating imprints of the person responsible for groping your paper. (Probably you, but you can yell at the kids if it makes you feel better.) It is impossible to make a smooth, even tone with charcoal or graphite powder in areas with fingerprints.
-
Experiment: Put those creative thinking caps on! You never know when you might come across something that will produce the perfect texture you are looking for. Try different fabrics - smooth and rough. Just make sure the materials are clean and the color from dyes won't rub off on your paper.
-
One Last Tip: These are some of the materials and techniques I use. I offer these methods as a starting point, to help you achieve a style all your own. I believe there are as many techniques on how to draw as there are people. Never let any instructor or book make you believe that their way is the ONLY way. My theory is - if it works, use it. We all need to keep growing and experiment but keep true to your own vision
Work In Progress - Step-by-Step
Title:
"Inner Beauty"
Size: 18" x 14"
Medium: Charcoal, Graphite, Carbon on White
Paper
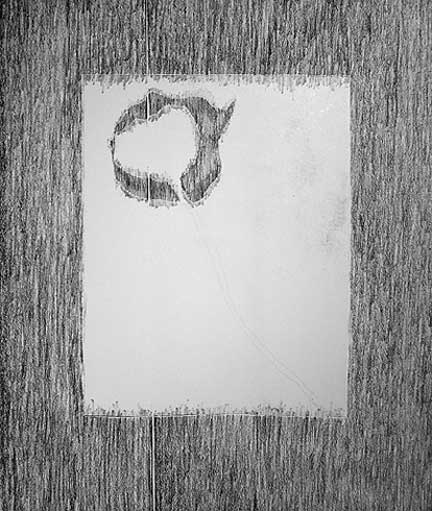
Step
One:
I am using charcoal for the background and graphite for the
subject. I'm using Arches 140 lbs hot press watercolor
paper for this drawing. This is one of my favorite
papers. It has enough tooth to create dark values yet is
smooth enough for very delicate textures. In this first
step, I have cut out the shape of my subject(s) in frisket
film and applied it to the paper. Then, I applied 3b soft
charcoal to the background to begin creating a wood texture.
If you are unfamiliar with the use of frisket film, here's a video that will explain it for you:
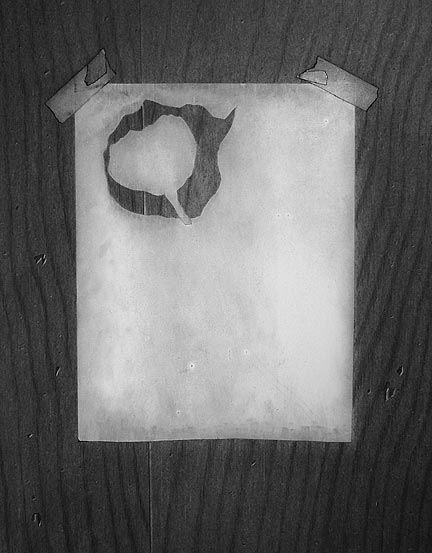
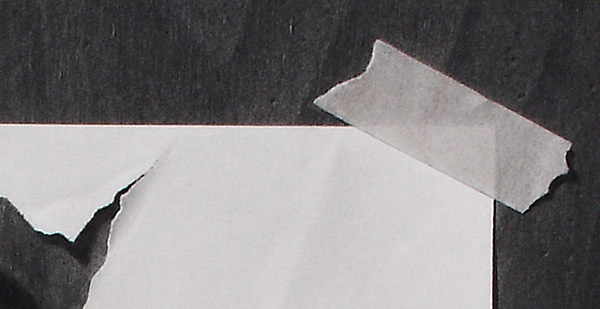
Step
Two:
Next,
I blended the charcoal with a piece of felt and added the
beginnings of wood grain. I repeated this several times to
build up a solid tone. After pulling out some highlights with
a clic eraser, I used a sharp hard charcoal pencil to create
shadows to help create slivers and chips in the wood. I also
applied masking tape at this point. I will be drawing masking
tape in these areas later. Some of the wood texture will show
through from the previous step and give my drawn masking tape
a little more transparency.
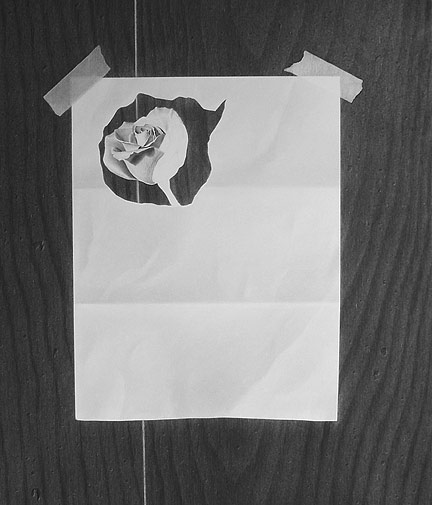
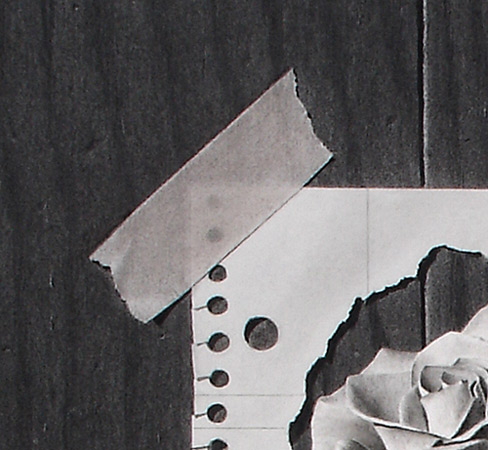
Step
Three:
Then,
I sprayed the drawing with fixative, Peeled off the frisket
and began rendering the subjects. I used a 6h graphite pencil
to add tone to the paper and blended with a chamois. In some
areas, I applied the graphite with the chamois. For those of
you that haven’t tried blending with a chamois, it can produce
incredibly subtle tones – almost like an air brush. I use a
kneaded eraser to pull out the crinkles in the paper. I am
using the same technique to render the rose, applying graphite
from dark to light and blending.
The
tape on the right shows what it looking like after I removed
the real masking tape. I have begun rendering
the tape on the right with a General's carbon sketch
pencil and blending with a tortillon. Using carbon here for
the tape will help separate it from the wood and the paper.
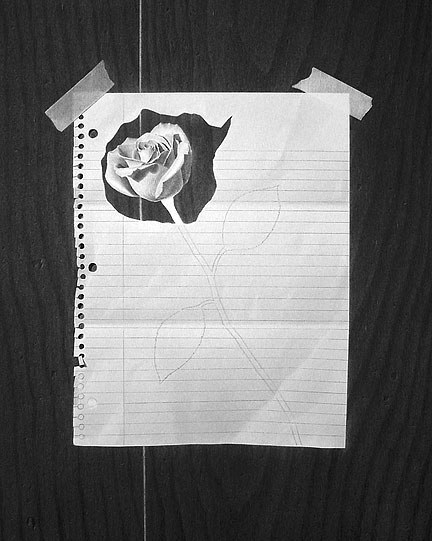
Step
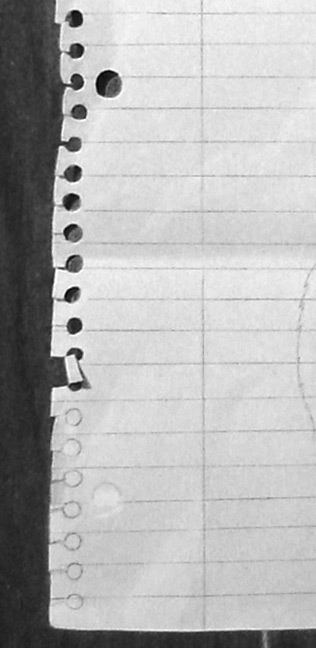
Four:
I have started adding the holes and lines of the notebook
paper. In case you are wondering, I didn’t darken the
background in this step, I had to turn up the contrast on this
a bit to show the lines on the paper.
I used charcoal for the holes
to match the background. Adding charcoal at this stage always
makes me nervous since it isn’t fixed and can easily smear. I
also continued to add shading to the rose and added the line
drawing of the stem.
The lines on the paper were
produced with a .3 mechanical pencil to keep them as sharp and
clean as possible. I used a French Curve instead of a
ruler because the lines had to follow the bends and crinkles
in the paper to keep the perspective correct. The best way to
describe a French curve is it’s a bendable rubber straight
edge
Close-up
.
Step Five:
Here’s
the final. I had a real tough time taking photos of this one.
I couldn’t get a picture of the softness of the paper shading
without compromising the darker background detail. The
original has more punch.
I’ve
included some close-ups to give you a little better Idea of
the detail. In the original drawing the tape is approximately
3/4" wide. It may appear larger than I drew it on your
screen.

Click
HERE for another Step-by-Step Lesson with Pictures and
Text
If you are interest in more hands on instruction,
you may consider registering for one of my
Pencil Drawing Workshops
Learn How to Draw!
with my realistic Drawing Technique book and pencil kits
For complete step by step instructions that include over 150 illustrations order a signed copy of my technique book "Drawing Realistic Textures in Pencil". To learn more about it's contents, click the book.

(click on the book for more info and to order a signed copy)
To see samples
of my work and learn more about the my techniques and
inspiration
click the links below.
Workshops: Workshop Dates • Students Comments • Student Drawings • Workshop In Progress • Workshop Email List
Galleries:
Western •
Family Themes
• Still Life
• Trompe L'oeil
• New Work • Questions
& Comments
Info: Technique Book
• Drawing Tutorial
• About the Artwork
• About the Artist